The Do It Yourself Dock
Photos courtesy Joe Upton
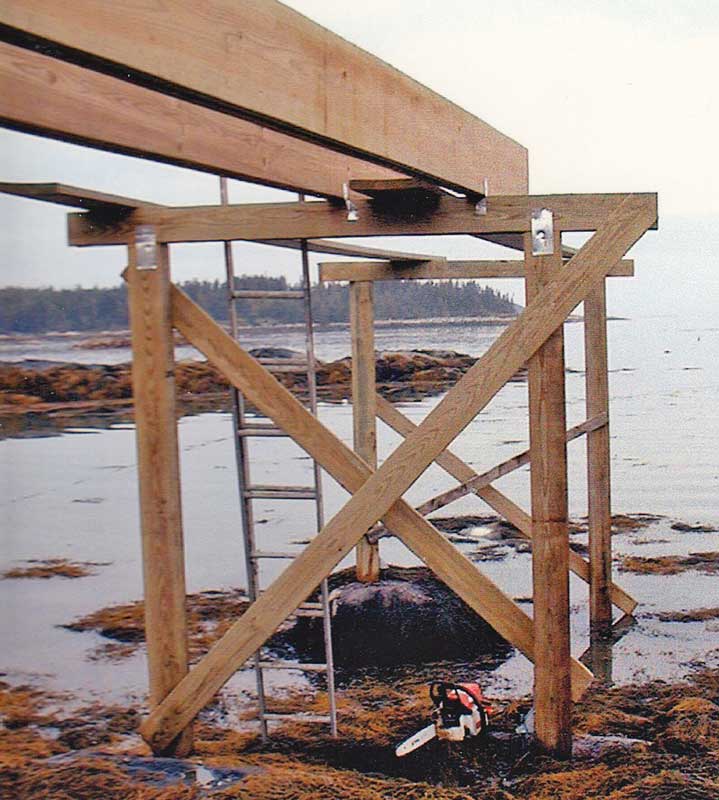
 required drilling holes in the granite ledge below.") It took two summers, but he managed to build his own dock, complete with pilings. Placing those pilings (below) required drilling holes in the granite ledge below.
It took two summers, but he managed to build his own dock, complete with pilings. Placing those pilings (below) required drilling holes in the granite ledge below.
For 17 years we slogged through the mud to get to our outboard from our cabin on Vinalhaven’s Old Harbor. For a brief two hours at the top of the tide, we could climb into the skiff with dry feet. The rest of the time the deal was to pull the boat in as far as possible with the haul-out line, and go the rest of the way in the mud.
Then in 1999 I heard about this tool, an electric hammer drill that could drill holes in granite. The very next day I pulled on my boots and explored the muddy cove, and found that there were enough freezer-sized boulders to support dock pilings without trying to drive them into the seemingly bottomless mud.
Luckily my dog-leg design (in order to stay on the boulders) needed just 75 feet of dock to deep water—just within the limits of the permit system in those days. As long as the dock was no more than 75 feet, and didn’t require pilings below the low tide line, you just mailed your application and fee to the state; if you didn’t hear back in 90 days, the permit was yours!
So, on the 91st day, I headed to Rockland for a hammer drill, and then to Vinalhaven’s Viking Lumber for extension cords, and 16' pressure-treated 6x6s and 2 x 12s. Here’s how it worked: First I used the hammer drill to drill a 3/4" hole 8 to 10 inches into a boulder—this took about 20 minutes of drilling, with frequent stops to blow the chips out. Next I drilled a 7/8" hole in the bottom of a 6x6, and drove (this requires a very big hammer) a 3/4" galvanized threaded rod into the hole in the boulder, leaving the top exposed. The threads essentially locked the rod into the granite.
Next came the really challenging part: lifting the heavy 6x6 vertically and fitting it over the 3/4" bolt—here’s where I was really glad that I drilled a 7/8" hole in the 6 x 6—so that it stood by itself, a little wobbly maybe, but not falling over. I repeated the process with a second 6x6 for the other half of the pair, and then tied them together with 5/4 x 6 PT decking, and a 6 x 6 across the top, and braced them to shore or the nearest pair with more of the 5/4 x 6s.
This wasn’t too hard on the first set of pilings, the ones closest to the shore end. They were only about 5' or 6' long, and the granite, though sloping, offered pretty good footing. But the farther I went from the shore (I had piling pairs about every 14') the longer the pilings got, and the steeper and more slippery the boulders. The three outer pairs of pilings were each over 12' long, weighing about 130 pounds. The task of lifting such a piling vertically and keeping it balanced while I and a helper tried to place it over the rod in the granite was close to Herculean; many tries ended up with the piling toppling into the water or mud, depending on the tide.
Finally with all the pairs installed, squared up and vertical, I drilled more holes in the granite for the heavy brackets to hold the pilings down against the uplifting effect of ice and tides.
Then it was time for the 16' pressure-treated 2 x 12 deck joists. At over 100 pounds each, they needed to be floated out and lifted up onto the horizontal 6 x 6s on top of the piling pairs, then tabbed into place with galvanized brackets.
It took me a whole summer working mostly alone just to put in the pilings, cross timbers, and heavy 16' 2 x 12 deck joists. At high tide I worked from the skiff, at low tide in the mud. And each morning and evening I took a good dose of Vitamin I (ibuprofen.)
The next summer our son, Matthew, helped in the afternoons after his sailing instructor job, decking the dock, building railings, and constructing the float and ramp on the beach. Except for having to essentially build a marine railway for the float, this was straightforward carpentry. And for around $4,800 in materials, we created something beyond exquisite.
One afternoon at high tide we towed the ramp and float into position and connected them to the dock. It was done: after 17 years of tramping through the mud: a dock! I stood and walked down it to the ramp and float for the first time. I high-fived my wife, Mary Lou, and the friends who had helped, and then, after they had walked up the ramp and away, walked it myself, again and again.
I was stunned: the place, the view, the feeling of what we had accomplished—it was almost overwhelming. For weeks afterward, I’d go down to the point, walk the dock, the ramp, down to the float, and feel that magic of what we had created all over again.
My ritual, almost every summer morning since, is to walk out to the dock, raise the flag, then go all the way down the ramp to the float, check the tie-up lines on the boats, and just marvel once again.
One day in 2019, returning to our little cove in dungeon thick fog, I zoomed in on the Navionics App on my iPad, and noticed that the dogleg shape of our dock had been added to the chart, as if to celebrate what we had created.
Joe Upton’s 1986 book Amaretto was republished in 2015 as Herring Nights: Remembering a Lost Fishery, by Tilbury House. He lives in Bainbridge Island, WA, and on Vinalhaven.
Related Articles