
Grow Your Own (Plants)
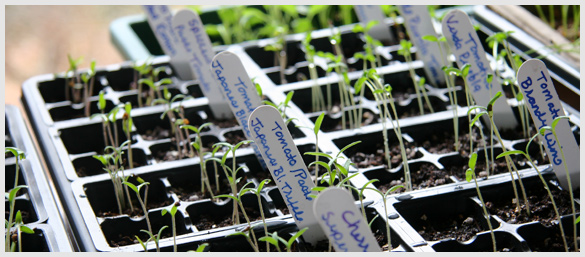 Starting seeds instead of purchasing plants means greater variety. Photo: Jamie Bloomquist
Maine’s often chilly, wet spring weather means that some varieties of vegetables and flowers don’t get enough time in the garden to mature. For these varieties starting them indoors long before the ground warms up is essential to ensure mature vegetables and a garden full of blooms. Increased variety another good reason to grow your own plants from seed. There are so many choices of seeds available to choose among. Starting plants from seed can also reduce your costs substantially over that of purchasing bedding plants.
It is important, though, to start the seeds properly. Most seed packages include information on seed propagation. Planting depth information should be followed closely. Some seeds need to be exposed to light to sprout, while others — especially large, hard-shelled seeds such as morning glories — benefit from being soaked or even sanded or nicked before planting. Check the package for this information before you dig in.
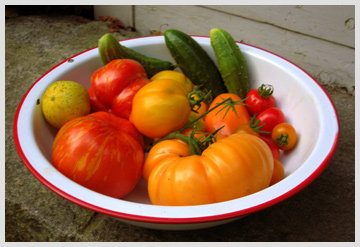 Heirloom tomatoes and unusual cucumber varieties
such as crisp lemon cucumbers await
those who plant from seed. Photo: Lynette L. Walther
• Step One Some vegetable seeds can be started right in the garden, such as beans, cucumbers, peas or corn, and some flowers such as sunflowers, poppies, and sweet peas.
Others — most notably tomatoes, peppers, and eggplant — and most annual and perennial flowers are best started indoors in flats or pots. Consult the seed package for information on when to plant in your area, how much time it will take the variety to fruit or flower and whether to plant directly in the ground or to start in containers. The same goes for vegetable plants with very small seeds, such as lettuce.
Lettuce plants will need to be thinned if planted directly in the garden, which disrupts their root systems anyway, so these are best started in shallow flats. When the plants are about three inches tall, the small seedlings can be placed into the garden. Follow the spacing suggestions on seed packages and water in thoroughly after planting.
Most seeds can be started in shallow flats. The little plants will be repotted soon after sprouting, so it isn’t necessary to provide especially deep soil. Two to three inches of potting medium is sufficient. Several varieties of plants can be started in one large flat. Because tiny seedlings often look similar, be sure to use tags to mark the varieties. Divide the flat into sections with lengths of string or slender sticks or drinking straws.
For tags, recycle plastic nursery tags or cut strips from plastic milk or bleach jugs, and use a black crayon or grease pencil (china marker) to write the variety on them. The soil in which seeds are started is critical. Ordinary garden soil may contain organisms or mold spores that can attack tender young seedlings, causing wilt or rot. A good commercial seed starting mix is the easiest planting medium to use. Some of today’s mixes include time-release fertilizers that make the job even easier. Look for one labeled “sterile” to be sure it does not contain any unwanted organisms.
Especially fine seeds can be mixed with dry builder’s sand for ease in spreading Don’t go wild on the seeds when you plant. Many annual and perennial flower seeds have become quite costly, and some seed packets may only include a couple dozen seeds. Plant only as many as you plan to use, with a couple extra thrown in for good measure. Store the remaining of the seeds in their original packet sealed in a plastic storage container placed in the refrigerator or freezer for use next time.
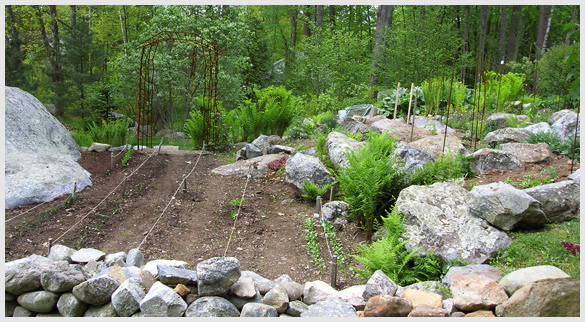 A Maine garden ready for planting. Photo: Lynette L. Walther
If the weather cooperates, place the flats outside where they get some morning sun. Protect them from the scorching afternoon sunshine. If temperatures are chilly, protect the seedlings by bringing them indoors. Use grow lights to give them enough light indoors, or place them in a cold frame, remembering to open or vent the frame on sunny days. Keep the flats moist with daily waterings, but avoid keeping them soggy, which encourages rot.
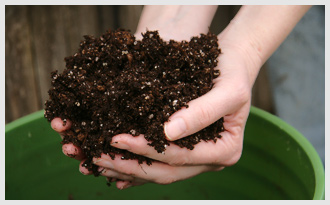 Good container mixes provide the blend necessary
to produce healthy productive plants.
Photo: Jamie Bloomquist
• Step Two One of the most important steps is to divide and re-pot the seedlings once they are about three inches high. (This does not apply to the tiny lettuces mentioned above.)
This is a step many gardeners skip, but it is the most critical step, in my opinion. It enables the little seedlings to establish a good, healthy root system before they are placed directly into the garden. If you’ve ever placed three-inch seedlings in the garden you know how easy it is for them to get trampled or die from thirst early on. They just aren’t ready for the transition. And though it takes a little more time to complete this step, in the long run the plants will have a much better survival rate, and will grow and produce faster than those put directly in the garden.
For containers, save and recycle those plastic six-packs in which nursery plants are sold, or use small paper cups or peat pots. Using the same soil mix as that in the seed-starting flats, fill each cup half way. Then, using an old fork to carefully separate the tangle of seedlings, place one seedling in each compartment, and fill in with more of the soil mix. When each six-pack is filled, give it a light watering with a water-soluble plant food and/or a root-stimulating hormone mix, and add a name-tag. After seedlings have been in the six-packs a couple of weeks, they should be hardened off outside for a few days before being planted in the garden.
• Step Three This is the easy part. Follow the guidelines on the packets for plant spacing as you set your hardened off plants out in the garden. Wasn’t that easy?

Related Articles